
Create a Digital Ocean Droplet
This article will explain how we can create a Digital Ocean Droplet.
First login to your Digital Ocean Account. Then click on the Create button and select the Droplets from the list.

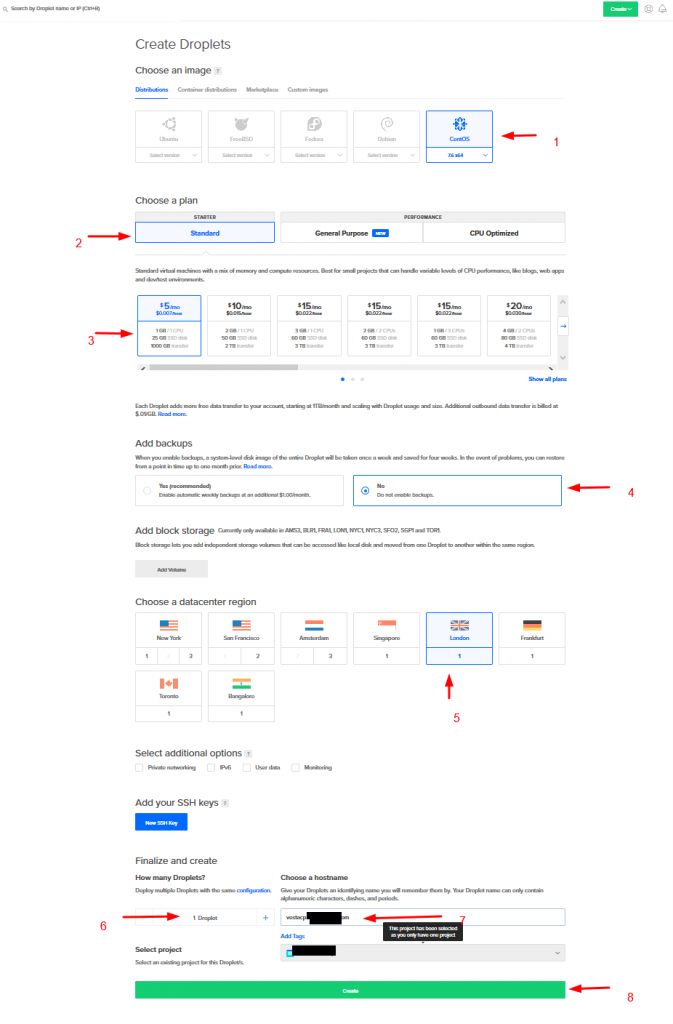
Then choose your Droplet specification and click Create button in the end.
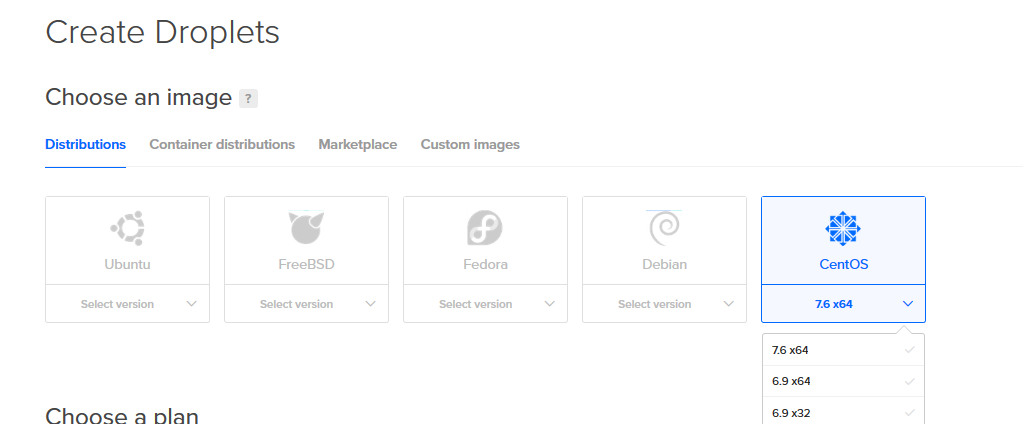
1. Choose an Image – (in my case I have selected CentOS 7.6 as the operating system)
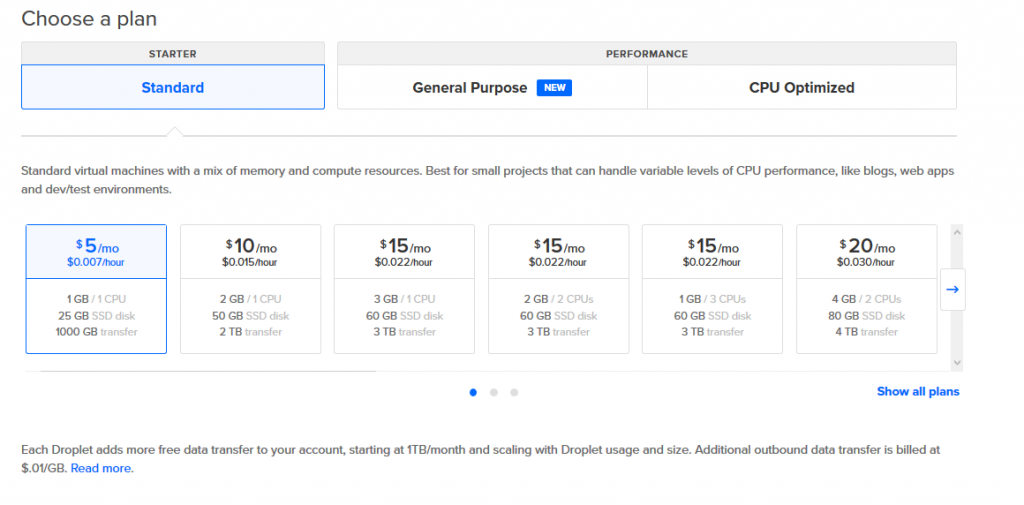
2. Choose a plan – (I would prefer to have a Standard and USD $5/month STARTER plan) STARTER is ideal for a Dev/Test or smaller websites and PERFORMANCE plan is ideal for a production work loads.
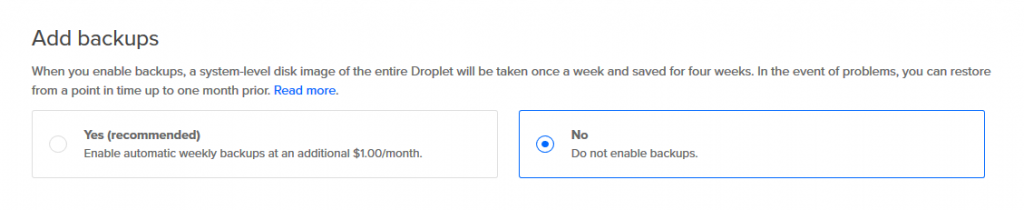
3. Add backups – I have selected No as i don’t need backups but for production environments I would recommend to enable backups and this will be charged USD $1/month.
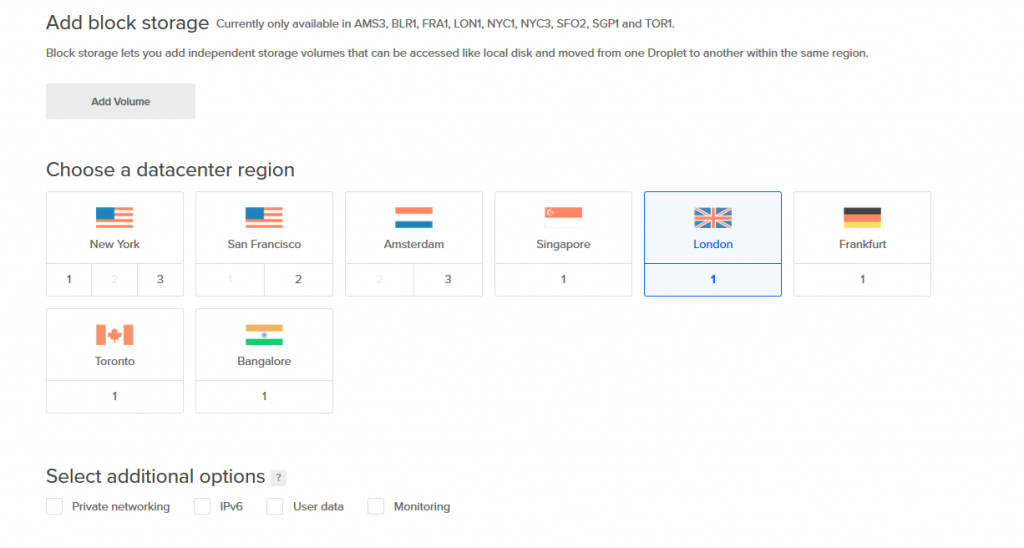
4. Add block Storage – You can add additional volume click on the Add volume button and follow up the process.
5. Choose a datacenter region – I have selected London and you can select according to your requirement.
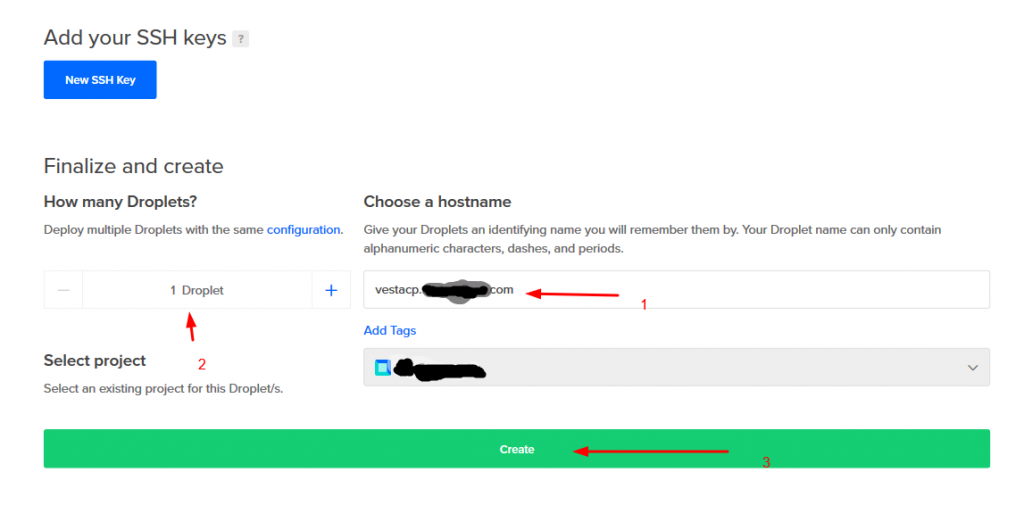
6. Add your SSH Keys – If need you can generate SSH key pair and enter public key clicking on the New SSH Key button.
7. Finalize and create – Keep the droplet count as 1 as it will create only one Droplet and enter the Droplet hostname as example.com and click Create Button to start provision the Dropet.
Overall selection is look like below.
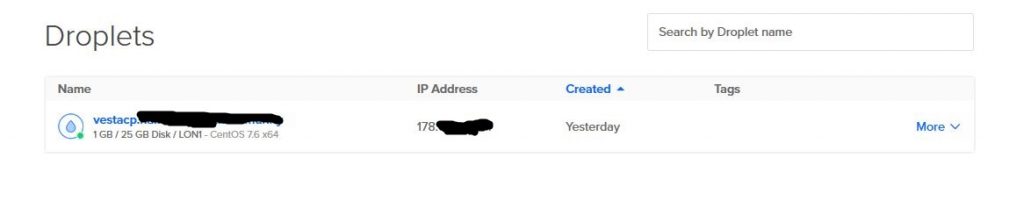
Few seconds after you will see the droplet has created under the Manage > Droplets section
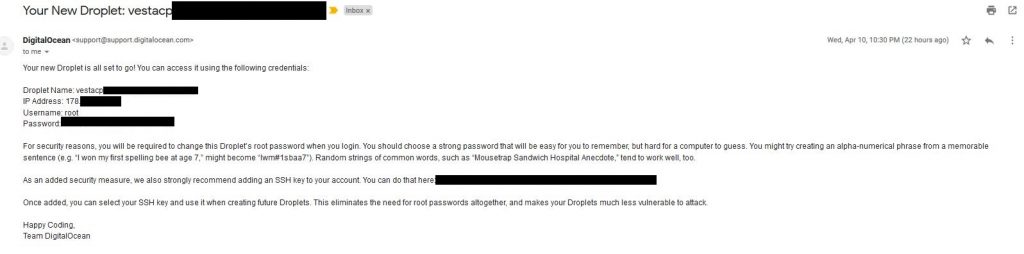
Now check your email and you will receive an email from Digital Ocean with server access details and credentials.
That’ it. ?