
The Great Migration: From VMware to CloudStack (with a few bumps)
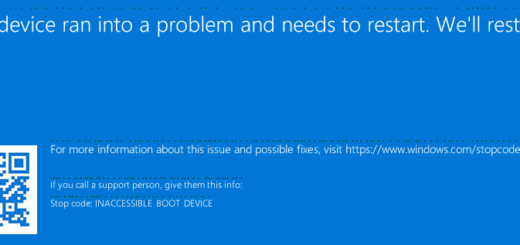
Migrating a virtual machine (VM) from one hypervisor to another can be a smooth process, but sometimes you hit a few roadblocks. This was the case when I recently moved an older Windows VM from VMware ESXi to a new CloudStack environment using KVM. The migration itself went fine, but when I tried to boot the VM on the new hypervisor, I was met with an INACCESSIBLE_BOOT_DEVICE Blue Screen of Death (BSOD).
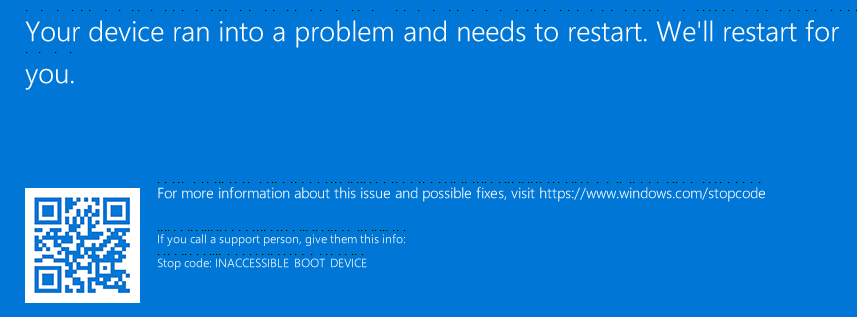
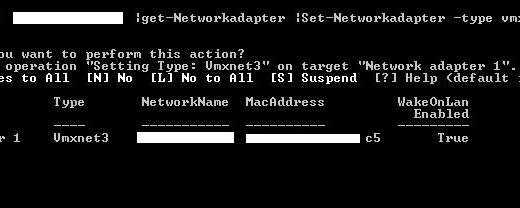
The root of the problem was a mismatch in disk controller drivers. The old VM was using an LSI SAS controller, which isn’t natively supported by KVM. The new CloudStack environment, however, was configured to use VirtIO SCSI controllers for optimal performance. This meant the Windows OS couldn’t see its own boot disk, hence the BSOD.
To make matters worse, I didn’t have the administrator password for the VM, which I needed to log in and install the necessary drivers. Here’s a walkthrough of how I overcame these two significant hurdles.
1. Injecting the VirtIO Drivers into Windows Recovery
The first step was to get the OS to recognize the new disk controller. Since the VM couldn’t boot, I had to inject the drivers directly into the Windows installation from the recovery environment. This method works for any driver, but in this case, we’ll use the VirtIO drivers.
First, you’ll need the VirtIO drivers. You can download the latest stable version from the Fedora project’s website. They’re distributed it as an .iso file. Once you have it, mount the .iso to your VM in CloudStack.
Now, let’s get into the recovery environment. Power on your VM. As it’s loading, repeatedly restart it a few times. After two or three failed boots, Windows will automatically launch its Recovery Environment. Else press F8 to load the menu with different methods and select the recovery method.
From the recovery screen, navigate to Troubleshoot -> Advanced options -> Command Prompt.
Loading the Driver
Once the command prompt opens, you’ll need to load the VirtIO SCSI driver so that the disk is visible to the system.
1. Switch to your mounted ISO: The VirtIO .iso will be assigned a drive letter, most likely D: or E:. Use the dir command to find it. Once you find it, type D: (or whatever the drive letter is) to switch to that drive.
2. Load the driver: The driver files are located in a folder on the ISO. Navigate to the correct directory for your operating system (e.g., vioscsi\2k19\amd64 for Windows Server 2019). Load the driver using the drvload command:
drvload vioscsi.inf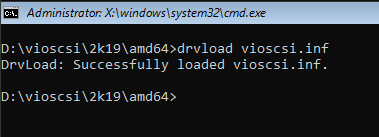
You should see a success message.
3. Verify the disk: Now that the driver is loaded, you can check if Windows sees the disk. Use diskpart to list the disks and volumes.
diskpart
list volume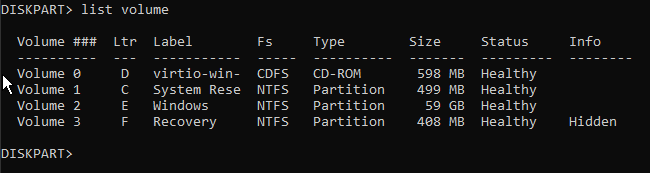
You should now see your Windows partition, which will likely be assigned a new drive letter like E:.
4. Inject the driver into the OS: Now that the driver is loaded, you need to permanently add it to the Windows installation. This is done using the Deployment Image Servicing and Management (DISM) tool.
dism /Image:E:\ /Add-Driver:D:\vioscsi\2k19\amd64\vioscsi.inf- Replace
E:with your Windows partition drive letter and adjust the path to thevioscsi.inffile if needed.
After DISM completes, you can reboot the VM. Windows should now be able to detect the disk and boot up without any issues.
2. Resetting the Administrator Password
The VM booted successfully, but I still couldn’t log in because I didn’t have the administrator password. This is where the second clever trick comes in. We’ll use the accessibility button on the login screen to open a command prompt with administrative privileges.
The “Utilman” Trick
The key to this method is replacing the utilman.exe file, which is the accessibility tool, with cmd.exe. When you click the accessibility button, the system will execute cmd.exe instead, giving you a command prompt without needing a password.
1. Access the Command Prompt: Just like before, repeatedly reboot the VM during startup to enter the Windows Recovery Environment
2. Go to Troubleshoot -> Advanced options -> Command Prompt.
3. Navigate to system32: Your Windows drive will likely be C:. Use the dir command to confirm. Once you’ve confirmed it, navigate to the system32 folder:
C:
cd windows
cd system32
4. Swap the files: Now, we’ll create a backup of utilman.exe and then replace it with cmd.exe.
copy utilman.exe utilmanbackup.exe
copy cmd.exe utilman.exe
When prompted to overwrite, type Y and press Enter.
5. Reboot the VM: Type exit and restart the VM normally.
Changing the Password
When the VM restarts, you will be on the Windows login screen. Don’t try to log in! Instead, click the Accessibility icon in the bottom-right corner.
If you performed the steps correctly, a command prompt with full administrative access will appear. From here, you can easily change the administrator password.
net user administrator NewPasswordReplace NewPassword with your desired password. After this, you can close the command prompt and log in with your new password.
Restoring the Accessibility Tool
Once you’ve successfully logged in, it’s a good practice to restore the original utilman.exe file. You can do this by running the following commands in an administrative command prompt within the OS.
cd C:\Windows\System32
copy utilmanbackup.exe utilman.exe
This ensures the accessibility tool works again as intended.
And there you have it! By combining these two powerful techniques, I was able to successfully migrate a tricky VM from VMware to CloudStack, resolving both the driver and password issues. It’s a great example of how a little bit of troubleshooting and a few clever tricks can get you past even the most frustrating of roadblocks.